Activities
1. Do a study of birds and their songs. Which ones sing high, which ones sing low, which ones sing on a telephone wire in your neighborhood? Listen to a recording of bird songs. Make a large musical staff with a telephone pole on each end. Place pictures of birds high and low on the staff. In the center of the staff put a class picture or a picture of the school chorus.
2. Create an animal chorus using pictures or stuffed animals. Have one animal in each section hold a sign that labels his part: soprano, alto, tenor, bass, etc.
3. Voice study: Bring in recorded samples of different spoken voices. Use commercials from radio or tv, books on tape, recorded poetry, or radio personalities. Most children's librarians and media centers have a good variety of spoken recordings. Listen to the recording. Discuss the differences in the voices. How do they make you feel? What do you think of when you hear them? Cartoon voices are silly, a narrator reading a mystery will sound mysterious, a narrator reading a story may also vary his voice when different characters speak. Discuss how a variety of voices add to our interest and listening pleasure.
4. Have children record a short poem or segment of a story and listen to their own voices.
5. Discuss how a voice is unique like a face… it tells us who is speaking when we hear it. Play the game “Guess the voice.” In random order, play back the recorded poems and have the children guess who's voice they are hearing.
6. Ventriloquist fun: Most children love the idea of ventriloquism. Using puppets, have the children experiment, one at a time, inventing a puppet voice and speaking without moving their lips. The easiest voice changes are to go lower or higher. Tell the children the puppet is hosting a birthday party and is greeting a guest. An easy beginning line with no m's, b's, p's, etc. is “Hi! So glad to see you. Here is a candy.” This activity can be extended to creating puppet voices and putting on a puppet show where the speakers are not seen. The emphasis then, is on the character's voice.
Costumes for “Place in the Choir” from Red Grammer's recording, Down the Do Re Mi
A group of teachers and parents got together and came up with the idea of making costumes for the students to act out the song, “All God's Critter's Got a Place in the Choir.” We focused on this particular song because we knew there would be enough parts to include a whole class or other large group. The idea was to make simple and affordable costumes that would be comfortable and durable. When we were designing the costumes we were very careful to use patterns that would allow the children's faces to be seen. If you have any questions about how to make a particular costume please feel free to call us at 1-800-824-2980 and ask for Maria.
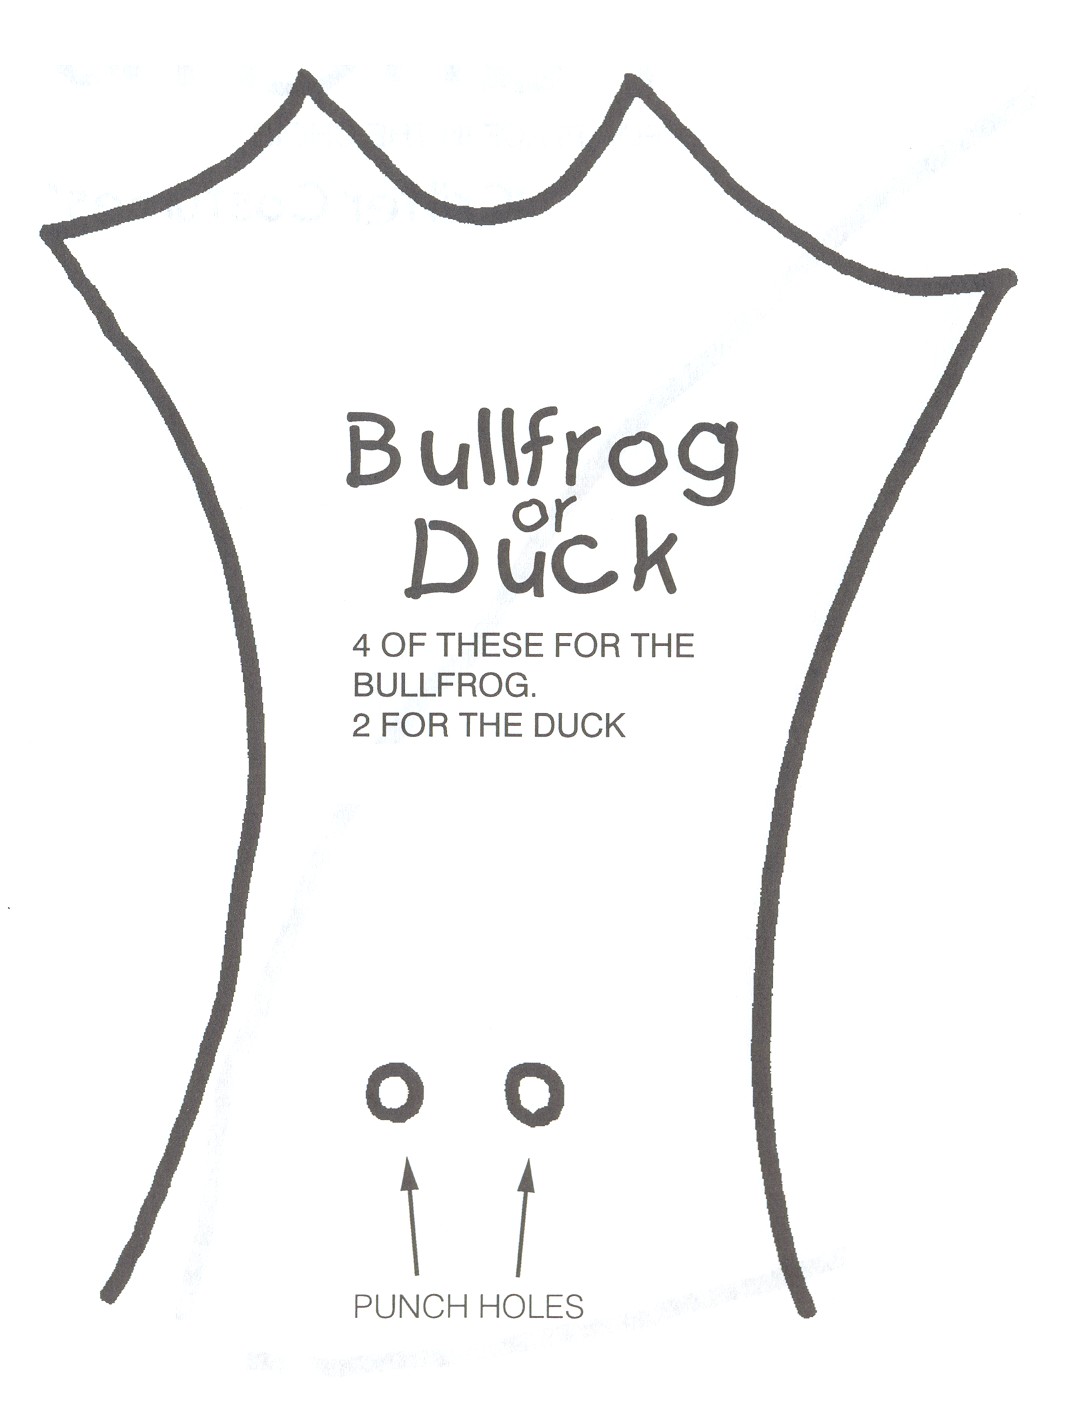
Bullfrog : Cut out 2 pieces of an egg carton and paint them green. Hot glue eyes on to the egg cartons and then hot glue the egg carton to a green visor hat. Using the bullfrog pattern (found below), trace the frog's webbed feet on either green construction paper or green fun foam (the fun foam is more costly than construction paper but the costume can last from year to year). With a hole puncher, punch 2 holes at one end of the frog foot so that a child can slip his shoelace through the hole and tie it to his/her shoe. For the hands you can use pipe cleaners and grip it around the child's wrist. Green stockings and a green t-shirt can complete this costume.
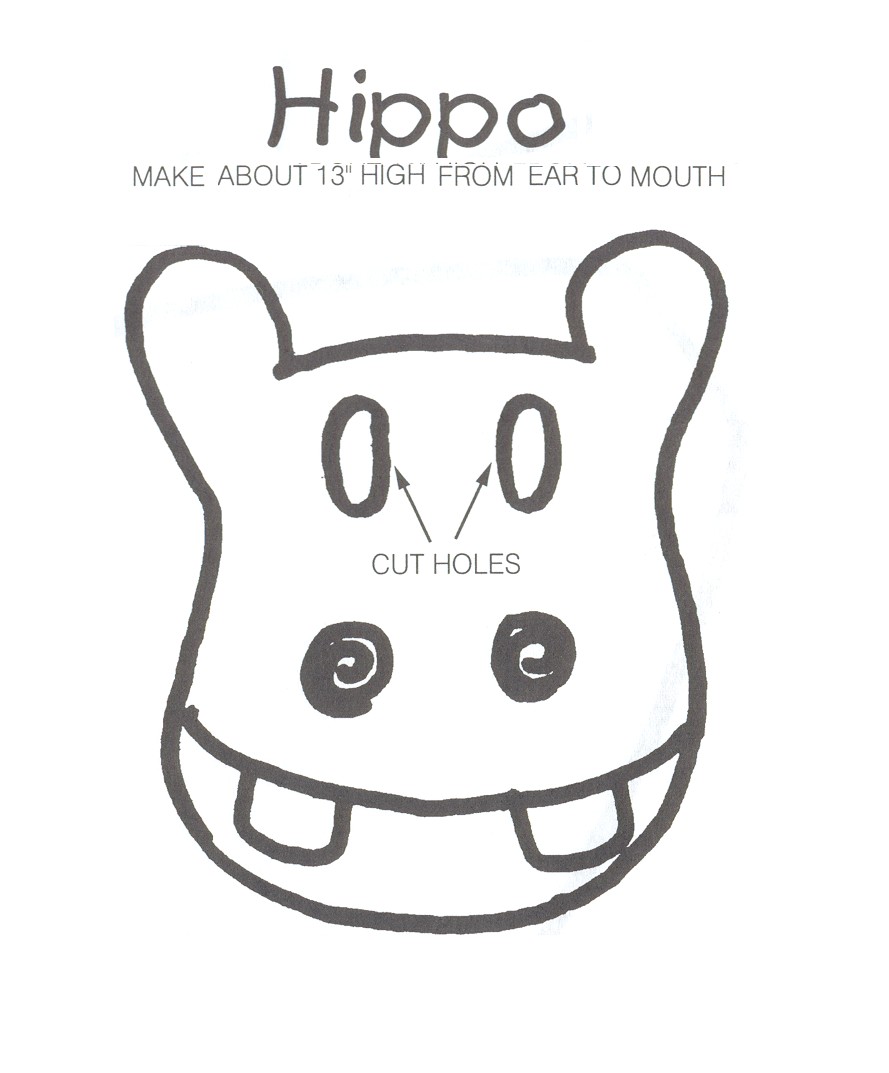
Hippopotamus : Using gray construction paper or oak tag painted gray, draw a hippo head like the one found below. Hot glue a tongue depressor to the bottom of the mask. Attach a long thin gray tail, made of felt, near the bottom of a gray t-shirt.
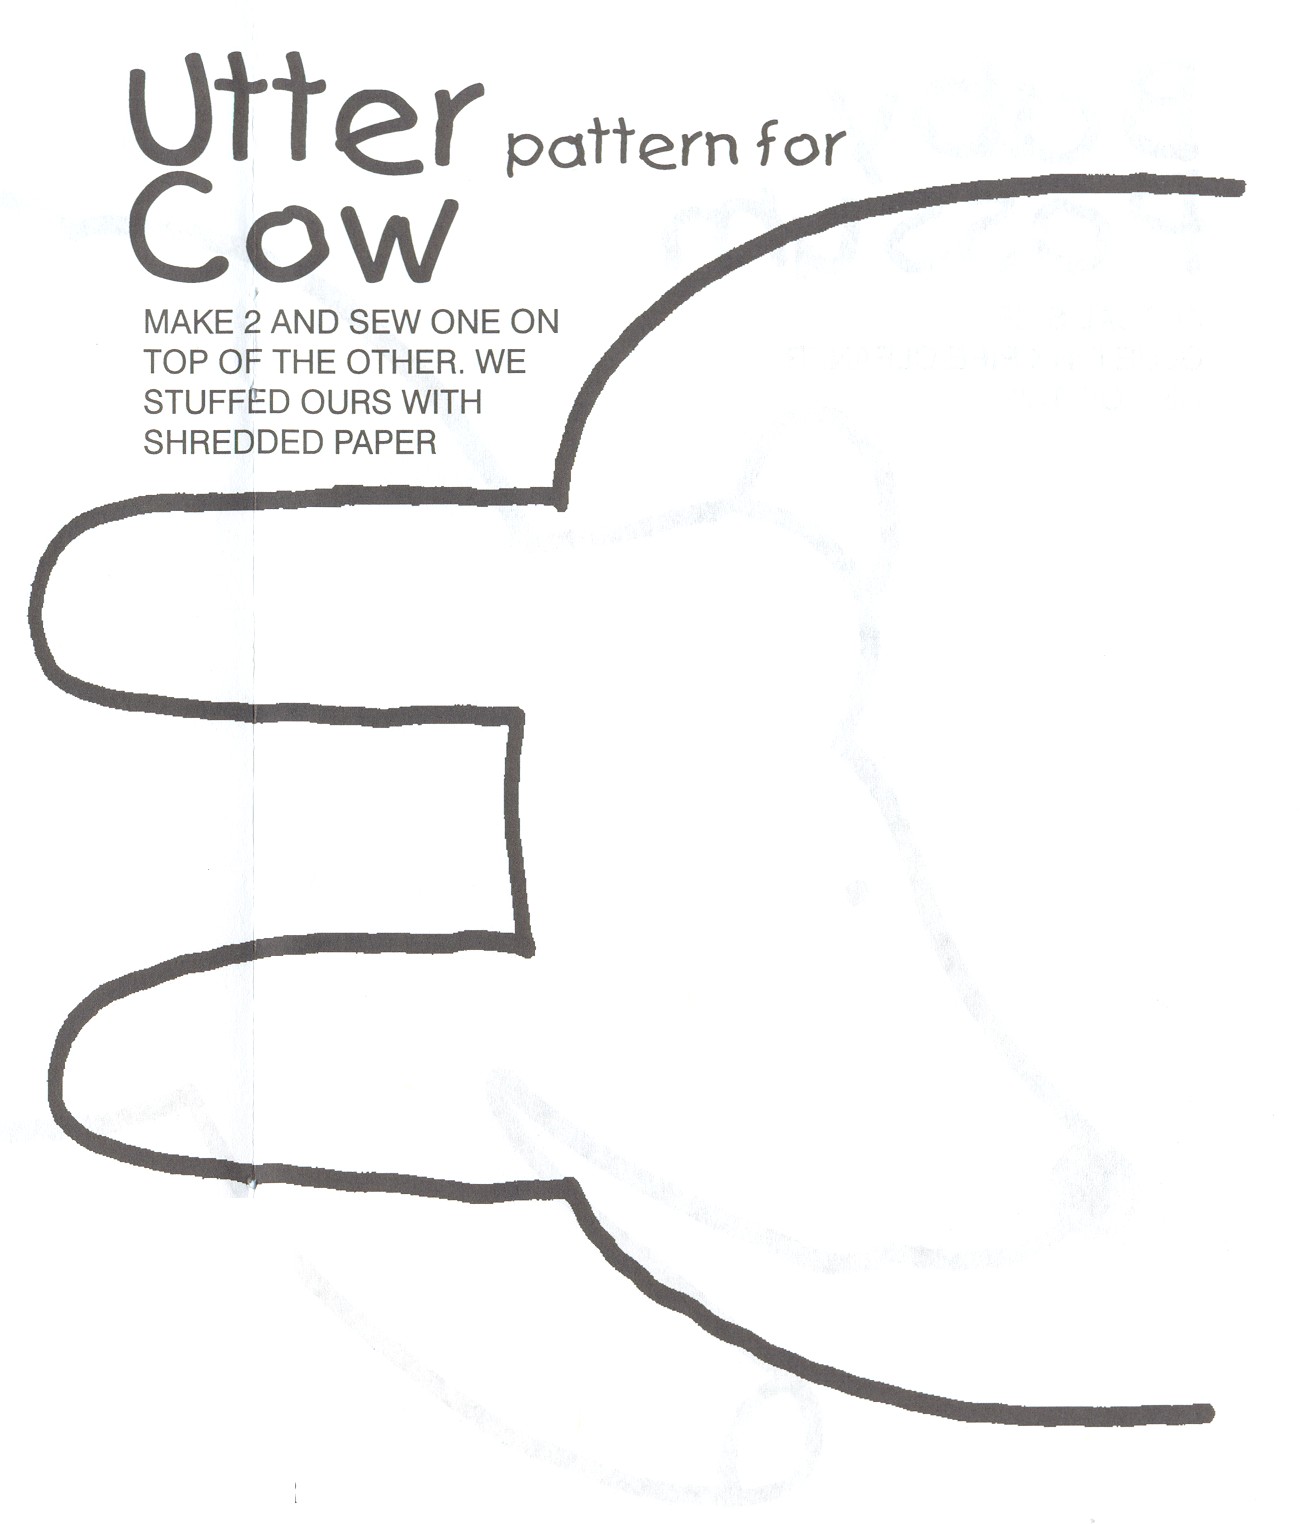
Cow : Paint black spots all over a white t-shirt. Using felt, stuff and sew on pink felt utters. You can use the cow pattern (found below). Tie a ribbon around a cow bell for the child to wear around the neck.
Dog : Paint dark brown spots on a light brown t-shirt. Add a tail using felt or the pipe cleaners that come extra thick and extra long. The pattern for the dog ears (found below) can be made from construction paper or brown material. We like to use the material because they can be used over again.
Cat : Use a head band and hot glue on some black felt pointed ears. On the back of a black t-shirt add a tail by using construction paper or long extra thick pipe cleaners.
Honeybee : Twist 2 black pipe cleaners around a black head band so that the pipe cleaners are hanging out. Add a black fuzz ball on each of the pipe cleaners to make the antennae. Paint a white t-shirt with black and yellow stripes.
Cricket : Make and paint a fiddle and bow out of oak tag (or use a real or toy fiddle). Make the antennae just like you did for the honeybee only use brown instead of black. From a brown paper bag or brown fun foam cut a triangle for the head and paint large black eyes on each side leaving the side with one point for the nose. Have the head band hold the face mask in place. Finish this costume by having the student wear a brown t-shirt.
Donkey : Out of gray construction paper or gray corduroy material cut the ears (same pattern as the dog ears). Using 3 strips of gray corduroy material (about 12” long) braid them together and attach to the back of a gray t-shirt for a tail. Fray the bottom of the tail.
Pony : Use a pony stick (Hobby Horse).
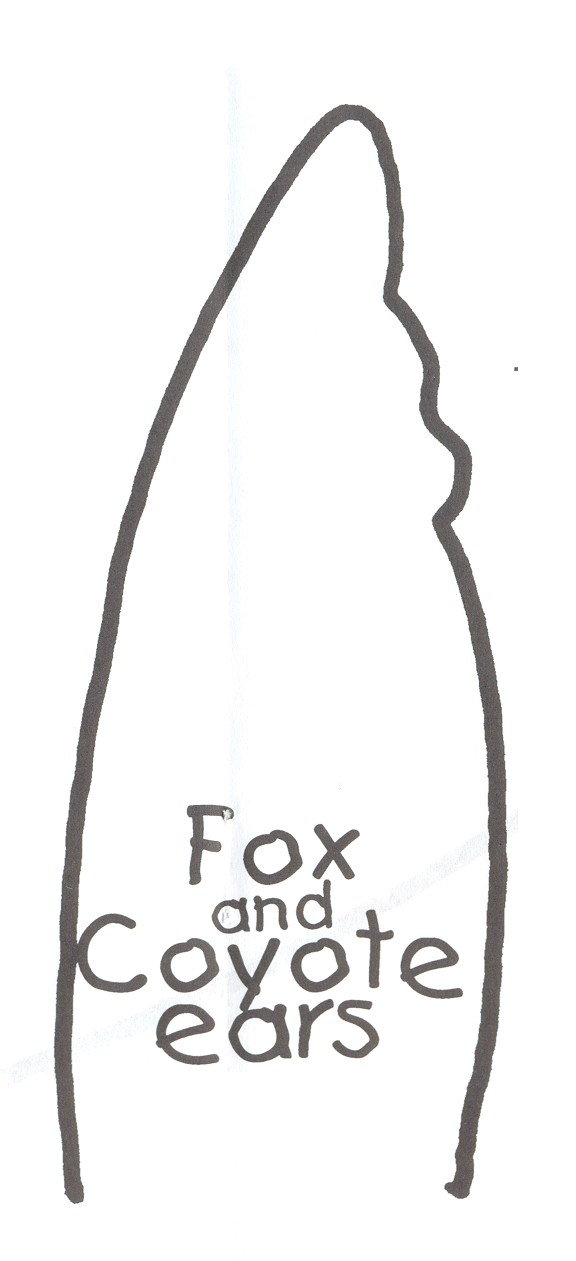
Coyote : Cut ears (pattern found below) out of gold construction paper and glue to thin elastic head band. Have student wear gold t-shirt with red bandanna around neck. Cut a moon shape out of yellow construction paper or oak tag and attach to string. The coyote comes out on stage holding the moon up in front of him/her and howls at the moon.
Hoot owl : Gather 2 yards of brown sheer material in the middle and sew to the back of a brown t-shirt at the neck line. Sew a tiny bit of material onto each sleeve of the t-shirt to help hold the material in the right spot. Where the material falls to the side, sew on a wrist band so that it can slip through the child's wrist. Now when the student flaps his/her arms the material will move up and down just like wings. The mask was made from a paper plate. Strips of brown construction paper (like a row of icicles hanging from a house, pattern found below) were cut and layered on the paper plate. White eyes and a pointed orange beak were added. The paper plate is then glued to an elastic head band.
Jaybird : This costume is made the same way as the hoot owl only use blue sheer material instead of brown. The t-shirt is white so that you can glue some blue feathers around the front of the neck.
Duck : Glue some yellow feathers to a yellow visor. Add a duck bill (We found ours for 25¢ in a Halloween store. We have also seen them in nature stores). Make the orange webbed feet out of the same pattern that you used for the bullfrog. To finish this costume we added a yellow rain slicker.
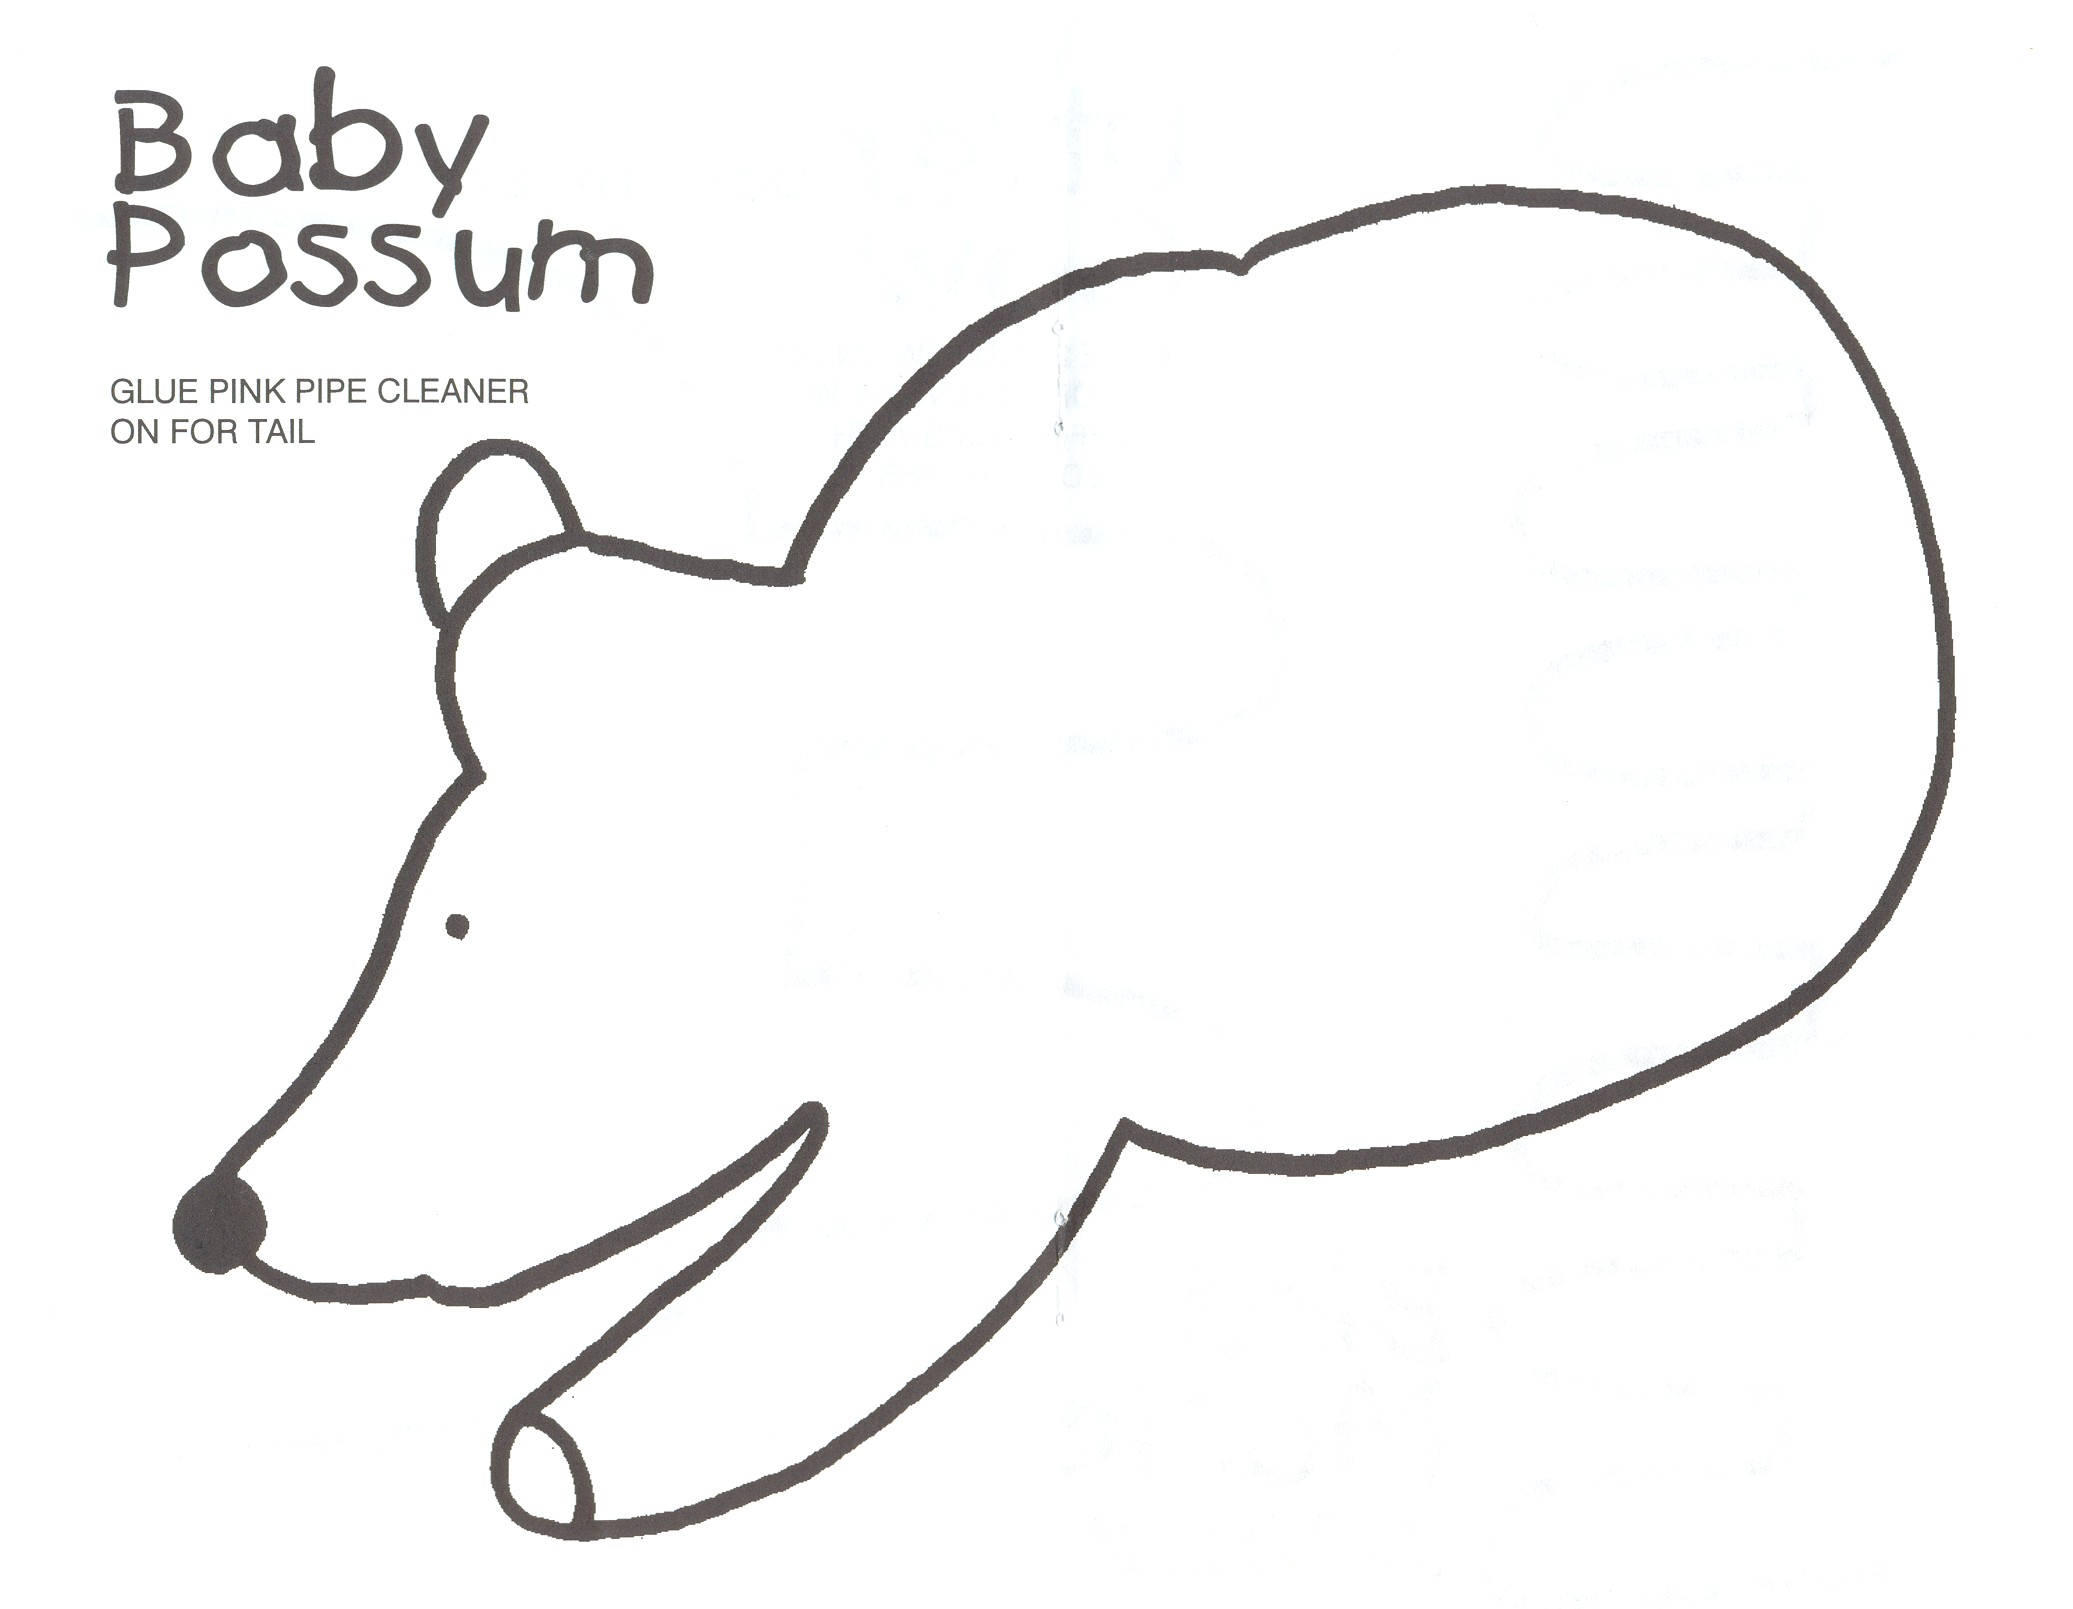
Possum : Attach a baby possum (pattern found below) made out of light brown fuzzy felt with a pink pipe cleaner tail, pink felt ears, and a pink felt nose to a light brown t-shirt. Attach pink felt curved ears to a black head band. (We found the nose for 25¢ at the same Halloween store.)
Porcupine : Tie three 5” pieces (2 brown and 1 black) of creative twist paper together in a knot that is in the middle. You will need to make 100 or more of these. Using safety pins, pin each knot to the outside of a white t-shirt. Tie about 10 to the top of a head band. If you want to be biologically correct with this animal then the creative twist knots should be on the back and not the front of the t-shirt.
Fox : Take a burnt red t-shirt and hot glue some light brown fur (we bought a boa from a Halloween store) to the neck and add a long piece of fur to back for the tail. Make the ears from the same pattern that you used for the coyote and hot glue a little fur to the inside of each ear.
Ox : Make the bull's horns from brown construction paper or fun foam and hot glue to a head band. Make a yoke from brown construction paper or fun foam to put around the student's neck. You could top this costume off with a brown t-shirt and a ring for the nose.
Grizzly bear : Cut a large oval piece of light brown fuzzy felt. Sew the felt to the middle of a dark brown sweatshirt (we also stuffed the felt with shredded paper for extra padding). Make the ears out of the brown fuzzy felt and hot glue to a head band.
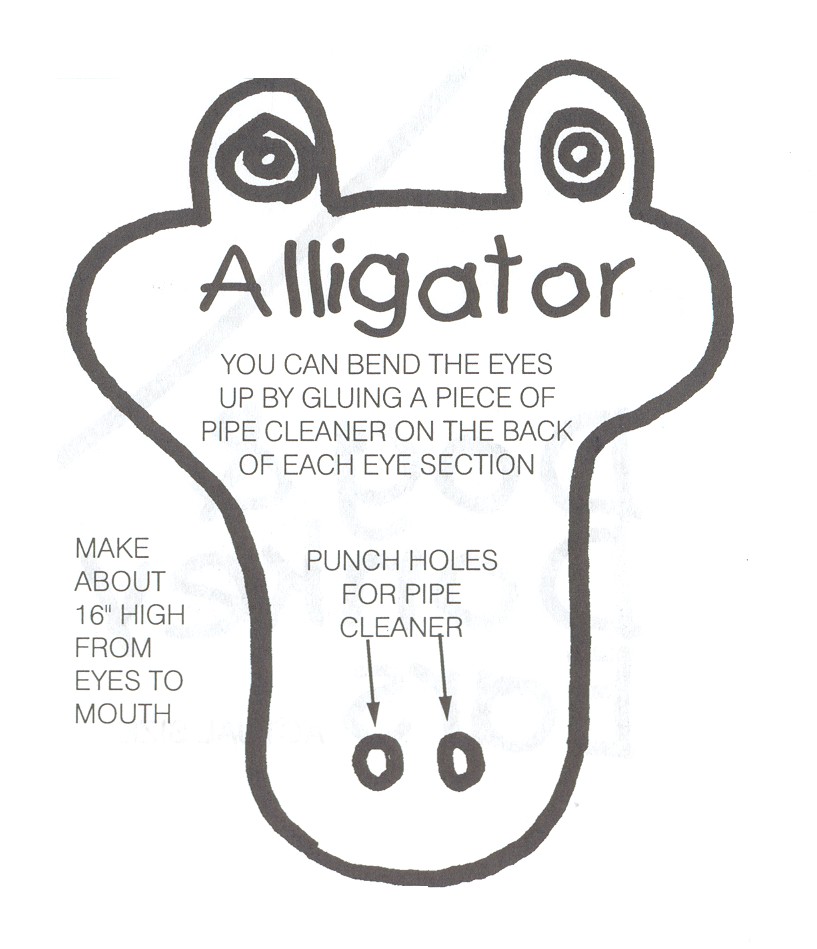
Alligator : Using the picture (found below) as a guide, cut the alligator head about 16” long from eyes to bottom of mouth. Glue on wiggly eyes. On the back of each eye section glue a small piece of pipe cleaner so that they eyes will bend forward and stay in position. Take white pipe cleaners and bend into the shape of teeth and hot glue on to top and bottom of mouth. Punch holes near mouth and slip pipe cleaners through to attach to child's fingers. Punch 2 more holes between eyes and slip pipe cleaners through to attach to child's arm.
Hawk : The same pattern as the hoot owl only the head will be long and pointed.
Raccoon : Gray t-shirt, with a raccoon cap, and a black mask.
Turtledove : Use the same idea as the hoot owl only the colors are gray and peach.


